Documentation
Vipub - PHP Social Network Platform Script
Vipub would like to welcome you to our official Knowledge Base. In our efforts to continually improve our product and assistance, we've established this Added knowledge base and are filling it with user and developer documentation.
Also, do not forget to check out our website where we publish the documents as articles. You can browse this website as our Blog.
You can access it from docs.nativsoft.com
- Current Version: v2.2.4
- Author: Robert Dayzen
- Created On: 29 January 2022
- Update: 23 January 2025
Important! This is the only official Vipub PHP Script, please stay away from any cracked, nulled or stolen copies, they may contain malwares.
With the official Vipub license, you get life time free updates, support, and custom work services.
If you have any questions that are beyond the scope of this help file, Please feel free to email via Item Support Page.
Installation
Follow the steps below to setup your site:
- Unzip the downloaded package and open the /Script folder to find all the script files. You will need to upload these files to your hosting web server using FTP or localhost in order to use it on your website.
- Below is the folder structure and needs to be uploaded to your website or localhost root directory:
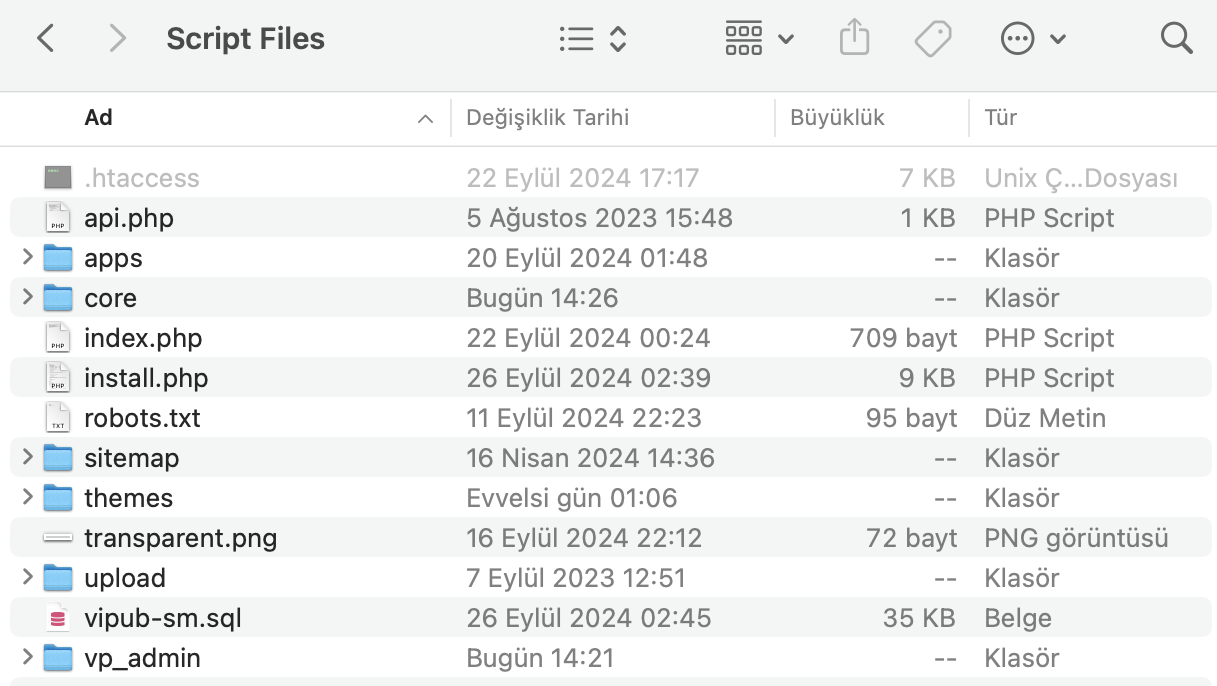
- You should upload all the files.
- Once you are done uploading, open your browser (Google Chrome is recommended).
- Select PHP Version: --> ea-php82
- MultiPHP Version: --> PHP 8.1 or PHP 8.2 (ea-php82)
- Go to http://www.your-site.com/install/install.php

IMPORTANT
-
To run and use the Vipub Script, please make sure you have applied the following configurations:
"Username -> administrator" "Password -> admin"
We are ready to go!
How to Setup SSL?
Important: after the installation is completed, you have to set the redirections, please follow the steps below to setup SSL.
- Open .htaccess file located in root directory.
- To redirect your website to SSL, copy and paste the code below after RewriteEngine On
RewriteCond %{HTTPS} off
RewriteRule (.*) https://%{HTTP_HOST}% {REQUEST_URI} [R,L] -
To redirect your website to www, copy and paste the code below after RewriteEngine On
RewriteCond %{HTTP_HOST} ^[^.]+\.[^.]+$
RewriteCond %{HTTPS}s ^on(s)|
RewriteRule ^ http%1://www.%{HTTP_HOST}%{REQUEST_URI} [L,R=301]
That's all!
Style Change or Edit
You can edit each area of your website separately and make them independent by restructuring the colors.
-
Admin Panel Main Style File:
admin_panel/assets/css/style.css -
Weclome (Auth) Page Style:
themes/{theme_name}/statics/style/auth/login.css | mobile_login.css | tablet_login.css -
Homepage PageStyle:
themes/{theme_name}/statics/style/home/home.css | mobile_home.css | tablet_home.css -
Messages Page Style:
themes/{theme_name}/statics/style/messages/messages.css | mobile_messages.css | tablet_messages.css -
Notifications Page Style:
themes/{theme_name}/statics/style/notifications/notifications.css | mobile_notifications.css | tablet_notifications.css -
Status Page (View Post) Style:
themes/{theme_name}/statics/style/status/status.css | mobile_status.css | tablet_status.css -
User Profile Page Style:
themes/{theme_name}/statics/style/profile/profile.css | mobile_profile.css | tablet_profile.css
Custom Theme
Currently, only one official theme (default) is supported by Vipub. If you want to develop a Added theme other than the default theme,
Vipub supports it!
Make sure that the Added theme file you will develop is located in the "themes" folder in the main directory and that you include your theme by specifying a special name. Then, you should find the theme you started developing on the "Admin Panel" > UI Themes" page and click the "Activate" button.
Logo & Favicon Settings
The Logo and Favicon Can Be Changed From
Admin Panel -> Logo & Favicon Settings
General Settings
Vipub A setup guide on configuring 3rd party services.
How to Setup SMTP
SMTP is used to send E-mails from your website.
- The first step of the process is to create an email account on your hosting package. This will be required for the SMTP configuration of your Vipub website and it will also ensure that all emails from your website are successfully delivered to your users. You can create a Added email account via cPanel.
-
Once you have your email account created, you can proceed with the actual configuration of your Vipub website. You need to access your website as administrator and go to SMTP settings from
Admin Panel --> SMTP Email Setup - Edit the following options:
- SMTP Host -mail.example.com (change example.com to your actual domain)
- SMTP Username - Enter the email account created in the previous chapter
- SMTP Password - Enter the password for your email account
- SMTP Port - SMTP server port, most used 587 for TLS, and 465 for SSL encryption
-
I made the changes above but my website is not sending any emails, what I can do?
- Please test your SMTP credentials at SMTPER, if the same config worked by the test, please contact us.
How to setup OneSignal?
OneSignal is used to push notifications to the user, even if the Vipub website is closed.
- Sign in to the Onesignal Console at https://onesignal.com/.
- Click on New App/Website
- Choose your app name and platform then click next.
- Fill the form with your website infromation, then click save.
- In next page, ignore the page and click on Finish.
- On top navbar, click on Keys & IDs
- Grab your OneSignal App ID & Rest API Key then go to
Admin Panel -> Website Settings -> OneSignal Settings & Push Notifications -
Edit the following options for Android & IOS:
- OneSignal APP ID - Enter the OneSignal App ID you created in the previous chapter
- OneSignal Rest API Key - Enter the Rest API Key you created in the previous chapter
- OneSignal Safari Web ID - Enter the Safari Web ID (If OneSignal gave you / Not Required)
- Note: Every platform requires a new app, for example you need to create a separate app for Android, and another one for IOS.
How to setup Facebook social login plugin?
- Log in to your Facebook account.
- Go to Facebook for Developers, click on My Apps and press Create App.
- Select Consumer. and click Next.
- Set the Display Name of your application.
- Enter the Contact Email.
- Click on Create App.
- Navigate to Facebook Login and press the Set up button.
- Select Web from the displayed platforms.
- Go to the Settings on the left nav bar section and choose Basic.
-
In the appeared menu some of the fields are generated automatically. All you need to do is fill in the rest of them, such as App Domains, Contact Email, Privacy Policy URL, Terms Of Service in particular.
- App Domains - Enter your domain name, without http or https (example.com, www.example.com).
- Privacy Policy URL Enter your website's privacy policy URL (example.com/terms/privacy).
- Terms of Service URL Enter your website's Terms of Service URL (example.com/terms/terms).
- User Data Deletion Enter your website's Terms of Service URL (example.com/terms/terms).
- Category - Choose your app category.
- Click on Save changes.
- Go to the left nav bar section and choose Facebook Login then click on Settings .
- Scroll down a bit and find Valid OAuth Redirect URIs
-
Add the following Redirect URIs:
https://yourwebsite.com/oauth/facebookhttps://www.yourwebsite.com/oauth/facebook
- Click on Save changes
-
On the top you'll see this message Your app has Standard Access to public_profile. To use Facebook Login, switch public_profile to Advanced Access Click on Get Advanced Access
- Enter email in the search box, then click Get Advanced Access, confirm the form.
- Enter public_profile in the search box, then click Get Advanced Access, confirm the form.
-
Last step is to set the app mode to Live
- On the top navbar, you'll find App Mode, click the toggle and set the app to Live
- Complete Data Use Checkup (If required)
- Again, go to the Settings on the left nav bar section and choose Basic.
- Grab and copy App ID and App Secret.
-
Go to
Admin Panel -> Social Login Settings -> Facebook Login Settings& Edit the following options:- Facebook App ID - Enter the App ID.
- Facebook App Secret - Enter the App Secret.
- Enable Login with Facebook.
Note: When you enter the URL of your website in to the App Domains field, make sure that it does match the URL of your website 100%.
This means, if you go to your website and then check the URL in the browser and the URL does look like http://www.your-website.com then you need to enter the exact same URL. If your website URL is http://your-website.com then you need to enter it that way, without using the www at the front of the name.
Use the same URL for the Valid OAuth Redirect URIs field.
If these entries do not completely match the URL of your website, the application won’t work and it will show an error message when you try to connect to the App.
How to setup Twitter social login plugin?
- Go to apps.twitter.com and click on Sign In in the top right. Log in using your personal Twitter credentials.
- Apply for API access: https://developer.twitter.com/en/apply-for-access, without this process you can't create any apps.
- If this is your first time creating an App on Twitter. You will see a button to Create an app
-
On the Create an application page, fill out all the information Twitter is asking for.
- App Name - Enter your website name.
- Application description - Enter your website description.
- Website URL - Enter your domain name, without http or https (example.com, www.example.com).
- Enable and click on Enable Sign with Twitter.
-
Callback URLs - Enter Redirect URIs, as following:
https://yourwebsite.com/oauth/twitter/callbackhttps://www.yourwebsite.com/oauth/twitter/callback
- Privacy Policy URL - Enter your website's privacy policy URL (example.com/terms/privacy).
- Terms of Service URL - Enter your website's Terms of Service URL (example.com/terms/terms).
- Tell us how this app will be used - Fill the infromation.
-
After you successfully created the Twitter application you’ll be redirected to its Details Tab. click on the Permissions tab. In this tab you will find a Access option. please choose Read and Write from the list, scroll down and click on the Update Settings button to save your changes.
- Request email address from users option should be enabled for Social Login plugin.
- After you make sure, that the settings have been saved, go to the application’s API keys page by clicking on the Keys and Tokens tab.
- Grab and copy API key and API secret key.
-
Go to
Admin Panel -> Social Login Settings -> Twitter Login Settings& Edit the following options:- Twitter Api Key - Enter the API key.
- Twitter Api Key Secret - Enter the API secret key.
- Enable Login with Twitter.
Note: When you enter the URL of your website in to the Website URL field, make sure that it does match the URL of your website 100%.
This means, if you go to your website and then check the URL in the browser and the URL does look like http://www.domain.com then you need to enter the exact same URL. If your website URL is http://domain.com then you need to enter it that way, without using the www at the front of the name.
Use the same URL for the Callback URL field.
If these entries do not completely match the URL of your website, the application won’t work and it will show an error message when you try to connect to the App.
How to setup Google social login plugin?
- Go to the Google API Manager console and log in using your Google credentials.
- After this click on Create Project link for create new project.
- Enter Project Name and click on Create button.
- Select the project from the dropdown menu beside Google CLoud Platform.
- Click on APIs & Services then click on +ENABLE APIS AND SERVICES .
- Search for Google+ and enable Google+ API.
- Once enabled, click on Credentials, on the top nav-bar, click on +Create credentials then click on Oauth client ID
-
In OAuth consent screen page, choose External, fill the form and click Save and Continue.
- In Authorized domains section, make sure to add your own domain name with or without www.
-
On the next page, you'll see the button Add or remove scopes, click on it.
- Look for auth/userinfo.email and select it.
- Look for auth/userinfo.profile and select it.
- Scroll down and click on UPDATE.
- If you successfully added the new scopes, click on SAVE AND CONTINUE.
- Ignore the Test users section and click on SAVE AND CONTINUE.
- Scroll down and click on BACK TO DASHBOARD.
- On the next page, click on PUBLISH APP and publish your application.
-
On the left nav bar, click on Credentials, on the top nav-bar, click on +Create credentials then Oauth client ID
- In Application type, choose web application.
-
In Authorized redirect URIs, add the following URIs:
https://yourwebsite.com/oauth/googlehttps://www.yourwebsite.com/oauth/google
- Click on Create then you'll see your Client ID and Client secret, copy those keys and headback to your website.
-
Go to
Admin Panel -> Social Login Settings -> Google Login Settings& Edit the following options:- Google API Key - Enter the Client ID.
- Google API Key Secret - Enter the Client secret.
- Enable Login with Google.
Note: When you enter the URL of your website in to the App Domains field, make sure that it does match the URL of your website 100%.
This means, if you go to your website and then check the URL in the browser and the URL does look like http://www.domain.com then you need to enter the exact same URL. If your website URL is http://domain.com then you need to enter it that way, without using the www at the front of the name.
Use the same URL for the Authorized redirect URIs field.
If these entries do not completely match the URL of your website, the application won’t work and it will show an error message when you try to connect to the App.
Payment Gateways Setup
Vipub comes with a lot of payment gateways
Here is a setup guide on configuring payment gateways.
Stripe
- Go to Stripe & create a new account.
- Login to your dashboard & turn your account on by flipping the switch from “Test” to “Live”.
- Click Activate Account in the pop up window to fill out the standard business details Stripe needs to send you payments.
- Once you’ve completed the entire form, click Activate Account.
- Now that your account is live, go to Your Account and click on Account Settings.
- Click the API Keys tab & copy the Live Secret Key & Publishable Key.
-
Go to
Admin Panel -> Website Settings / Payment Settings > Stripe, find Stripe and edit the following options:- Enable Stripe Payment Method by clicking on the toggle.
- Stripe API Secret Key - Your Stripe secret key that starts with sk_
- Stripe Publishable Key - Your Stripe publishable key that starts with pk_
RazorPay
- Go to the Razorpay website and Sign Up.
- Enter your work email address and a password for your Razorpay account and click Create Account.
- Fill Pre-sign Up Form
- Verify Email Address
- Once your account is created, you have access to the Test mode on the Dashboard. Test mode is used for testing purposes and does not involve actual money transactions. However, you would need to activate your account in order to accept live payments.
- To create an Application, follow this RazorPay Guide.
-
Once your application was created, take the required keys then go to
Admin Panel -> Website Settings / Payment Settings > RazorPay, find RazorPay and edit the following options:- Enable RazorPay Payment Method by clicking on the toggle.
- Application ID - CashFree application ID you created in the previous chapter.
- Application Secret - CashFree application secret key you created in the previous chapter.
PayStack
- Sign Up with Paystack
- Verify your sign up using a verification link sent to your email.
- The next thing is to sign in to your new Paystack account
- On your Dashboard you will find your public and secret key
-
Grab the keys, then go to
Admin Panel -> Website Settings / Payment Settings > PayStack, find PayStack and edit the following options:- Enable PayStack Payment Method by clicking on the toggle.
- Secret Key - CashFree application secret key you created in the previous chapter.
Iyzico
- Create an account in Iyzico
- You can access the API and Security Key values, where you can test the services from the Settings menu, without the need for email activation
- Grab the keys then go to
Admin Panel -> Website Settings / Payment Settings > Iyzico,paste the keys in Iyzico form and fill the rest of the infromation.
Storage Configuration
Here is a setup guide on configuring third party storages.
How to setup Amazon S3 Storage?
The script will upload images, videos, and all media files to Amazon, your server's CPU load will decrease and your website performance will increase.
- Sign in to the AWS Management Console and open the Amazon S3 console at https://console.aws.amazon.com/s3/.
- Choose Create bucket.
- In Bucket name, enter a DNS-compliant name for your bucket.
- In Region, choose the AWS Region where you want the bucket to reside.
- Under Object Ownership, choose ACLs disabled.
- Choose Create bucket & You've created a bucket in Amazon S3.
-
Also make sure you added the Bucket Policy by adding this JSON code in Bucket Policy, You need to replace YOUR-BUCKET-NAME with your Bucket Name.
{ "Version": "2008-10-17", "Statement": [ { "Sid": "AllowPublicRead", "Effect": "Allow", "Principal": { "AWS": "*" }, "Action": "s3:GetObject", "Resource": "arn:aws:s3:::YOUR-BUCKET-NAME/*" } ] } -
Also make sure you have configered the CORS configuration by adding this JSON code below:
[ { "AllowedHeaders": [ "Authorization" ], "AllowedMethods": [ "GET" ], "AllowedOrigins": [ "*" ], "ExposeHeaders": [], "MaxAgeSeconds": 3000 } ] -
Next step is to get Security credentials.
- Open the IAM console at https://console.aws.amazon.com/iam/
- On the navigation menu, choose Users.
- Choose your IAM user name (not the check box).
- Open the Security credentials tab, and then choose Create access key.
-
To see the new access key, choose Show. Your credentials resemble the following:
- Access key ID:
AKIAIOSFODNN7EXAMPLE - Secret access key:
wJalrXUtnFEMI/K7MDENG/bPxRfiCYEXAMPLEKEY
- Access key ID:
- Go to
Admin Panel -> Website Settings -> Cloud Storage Settings > Amazon S3 -
Edit the following options:
- Amazon Bucket Name - Your new bucket we created on the previous chapter
- Amazon S3 Key - Your account access key ID
- Amazon S3 Secret Key - Your account secret access key
- Amazon S3 bucket Region - Your new bucket region we created on the previous chapter
- if your website is freshly installed and still brand new, you can ignore the upload process below and press only on Test Connection
How to setup BackBlaze Storage?
The script will upload images and audio files to BackBlaze, your server's CPU load will decrease and your website performance will increase.
-
How to setup Wasabi (S3) Storage?
You can store images, videos, and all media files in Wasabi using S3 method.
- Sign in to the Wasabi Console at https://wasabi.com/.
- Click On Create A bucket, and fill the required information, then create the bucket.
-
Getting the access keys:
- Go to https://console.wasabisys.com/#/access_keys
- Click on Create new access key
- A message indicates that your key was created, please download the file.
- Grab the access and secret keys from the downloaded file.
- Grab those info, then go to
Admin Panel -> Website Settings -> Cloud Storage Settings -> Wasabi -
Edit the following options:
- Wasabi Bucket Name - Your new bucket we created on the previous chapter
- Wasabi Key - Your account access key
- Wasabi Secret - Your account secret access key
- Wasabi bucket region - Your new bucket region we created on the previous chapter
- if your website is freshly installed and still brand new, you can ignore the upload process below and press only on Test Connection
How to setup FTP Storage?
You can store images, videos, and all media files in another server using this feature.
- The first step of the process is to create an FTP account on your hosting package. This will be required for the FTP configuration of your Vipub website and it will also ensure that all files from your website are successfully uploaded to your server. You can create a new FTP account via cPanel.
- Once you have your FTP account created, you can proceed with the actual configuration of your Vipub website. You need to access your website as administrator and go to FTP settings from
Admin Panel -> Website Settings -> Cloud Storage Settings -> FTP Settings -
Edit the following options:
- FTP Hostname - ftp.example.com (change example.com to your actual domain, or use your own domain name)
- FTP Username - Enter the FTP account you created in the previous chapter
- FTP Password - Enter the password for your FTP account
- FTP Port - Enter your FTP port number, default 21.
- FTP Path - Enter the path to /upload folder, default ./
- FTP Website URL and Dir - (IP or domain where the FTP server is pointed to) example: storage.com, files will be surved from here.
- if your website is freshly installed and still brand new, you can ignore the upload process below and press only on Test Connection otherwise make sure to upload "upload/" folder to your FTP server.
How to update Vipub?
A detailed documentation on how to update your website to a new update. Don't worry the update process is very easy!
- First of all, you have to download the latest version from your codecanyon Downloads page.
- Backup your website files & database using cPanel.
-
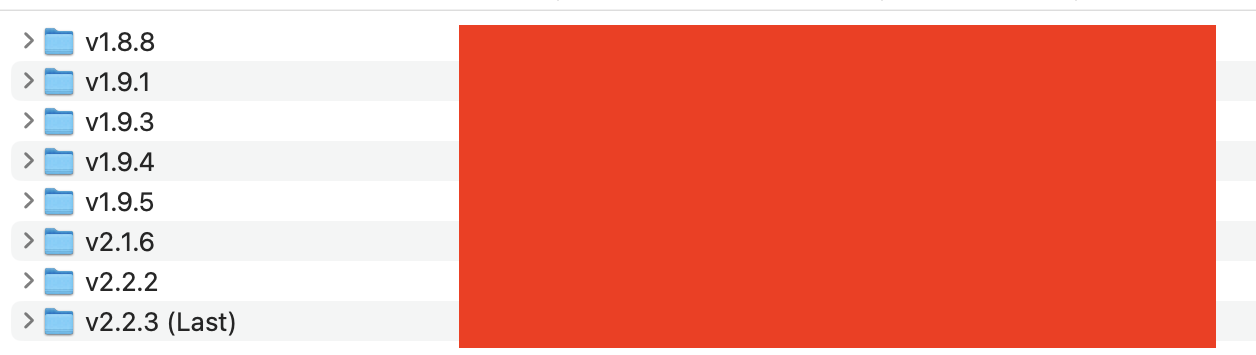
Once you have downloaded the script, you can find the update files in
./Updatesfolder, as shown below: - Choose the update version, and extract it to your Desktop.
-
Open the folder/version you want to update your website to,
v1.* - Upload ALL files/folders (SELECT ALL) found in the folder to your server and overwrite them.
Note: If you have missed an update or multiple updates, you have to update your site version by version manually.
Please don't skip a version.
e.g: (If your website is on v3.0.1 and you want to update to v3.0.8, you have to update to v3.6, v3.6.3 and then v2.2.4)
Please don't skip a version.
e.g: (If your website is on v3.0.1 and you want to update to v3.0.8, you have to update to v3.6, v3.6.3 and then v2.2.4)
After typing the URL in the link bar and pressing ENTER, you should now see the page in the image below:
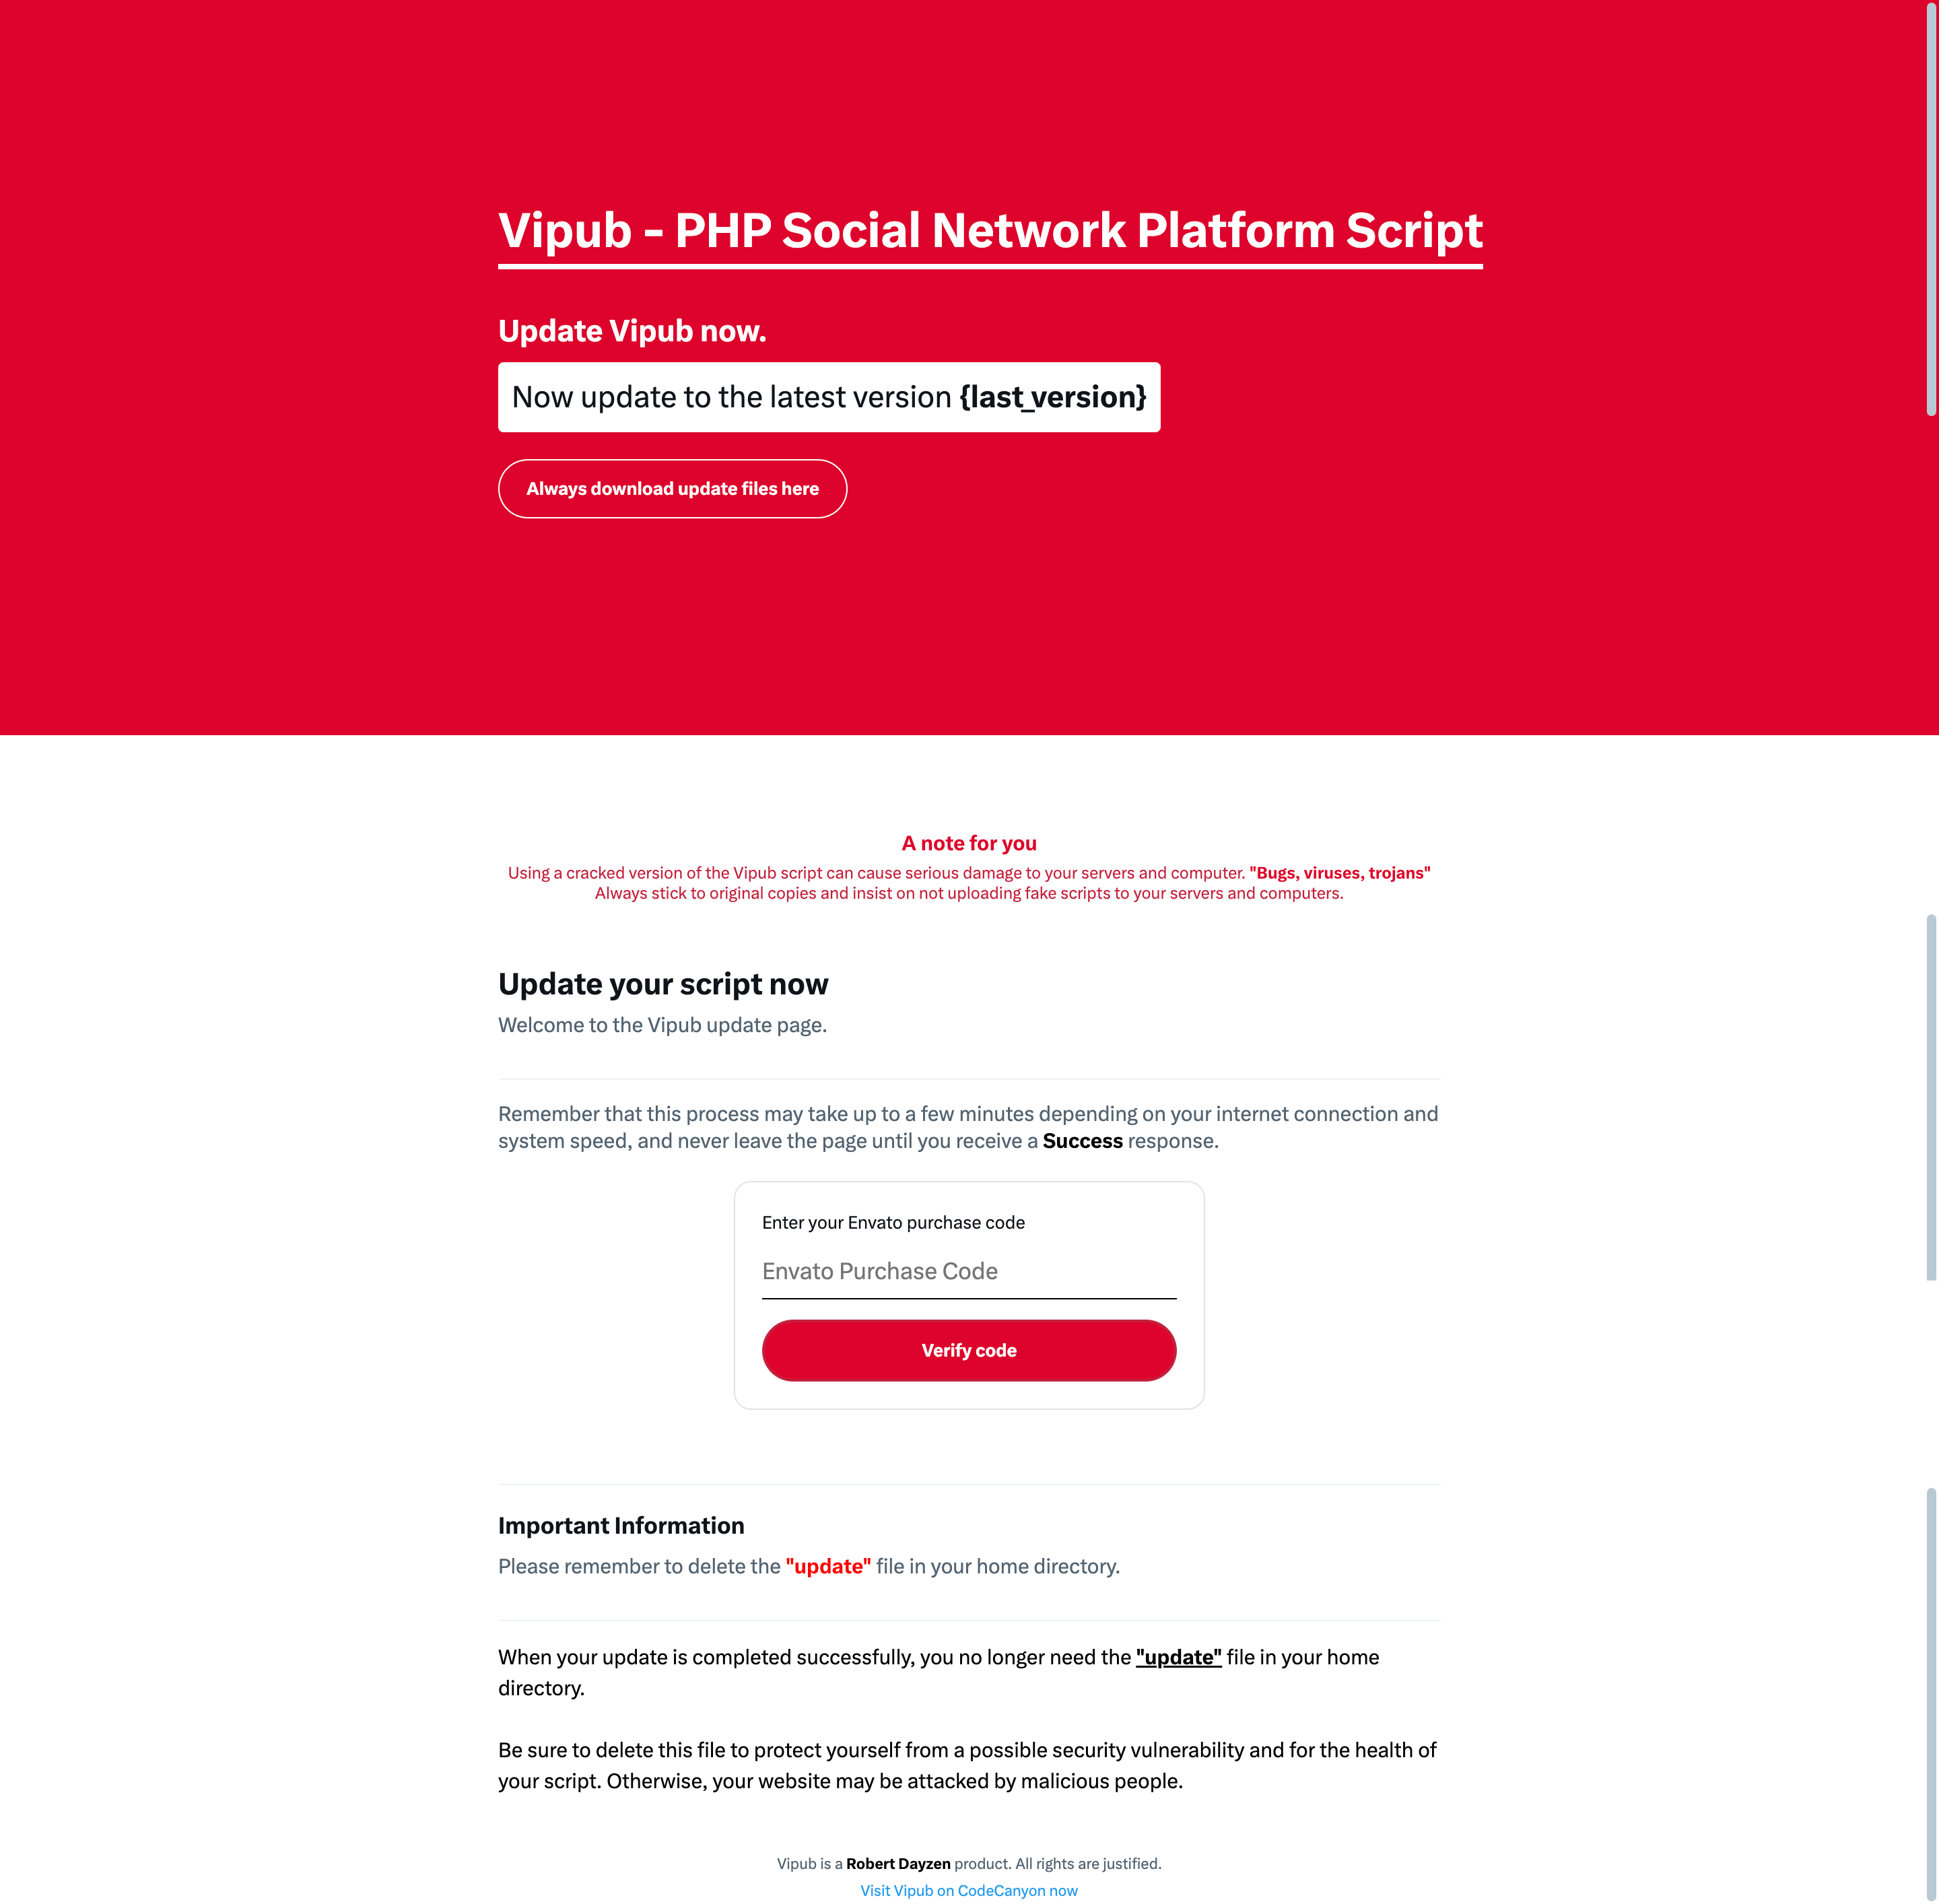
Before starting the update process, we must verify that you actually purchased Vipub. Therefore, you should add your Vipub purchase code, which you obtained from CodeCanyon, into the box in the image and then click the button.
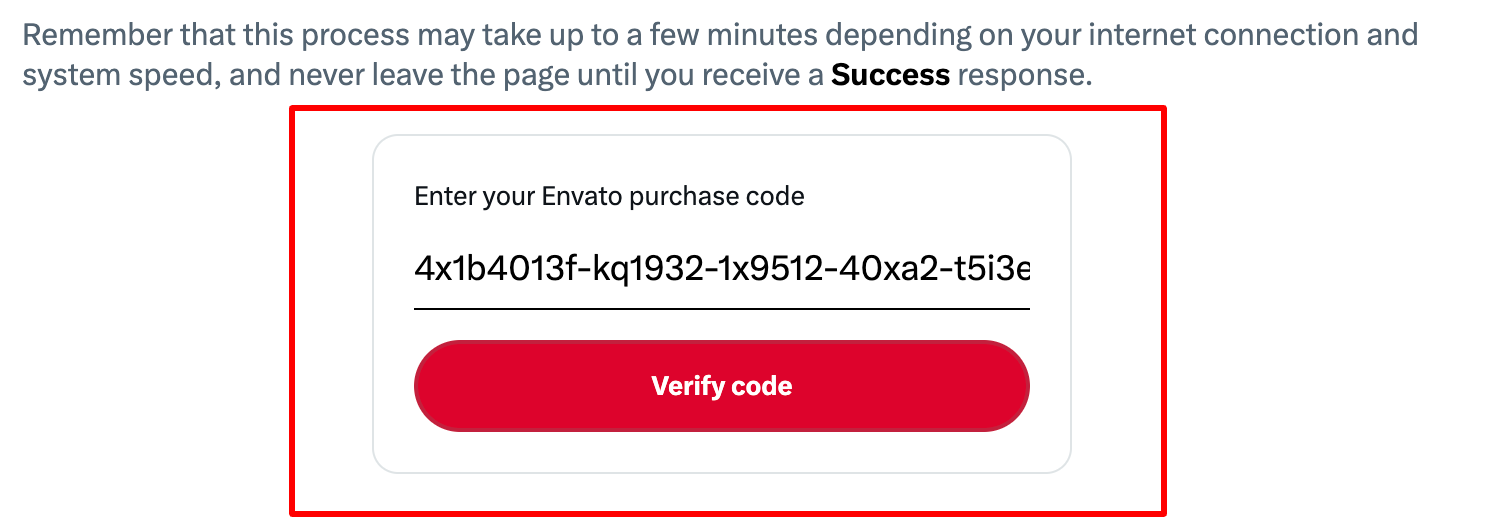
Once your purchase code is verified, you will be notified by the system and proceed to the second step. When you press "Start" the version of your Vipub script will be updated.
Please make sure that you do not leave the page before the update process is completed. When your transaction is successful, you will be directed to the "Successful" page and your update process will be completed here.
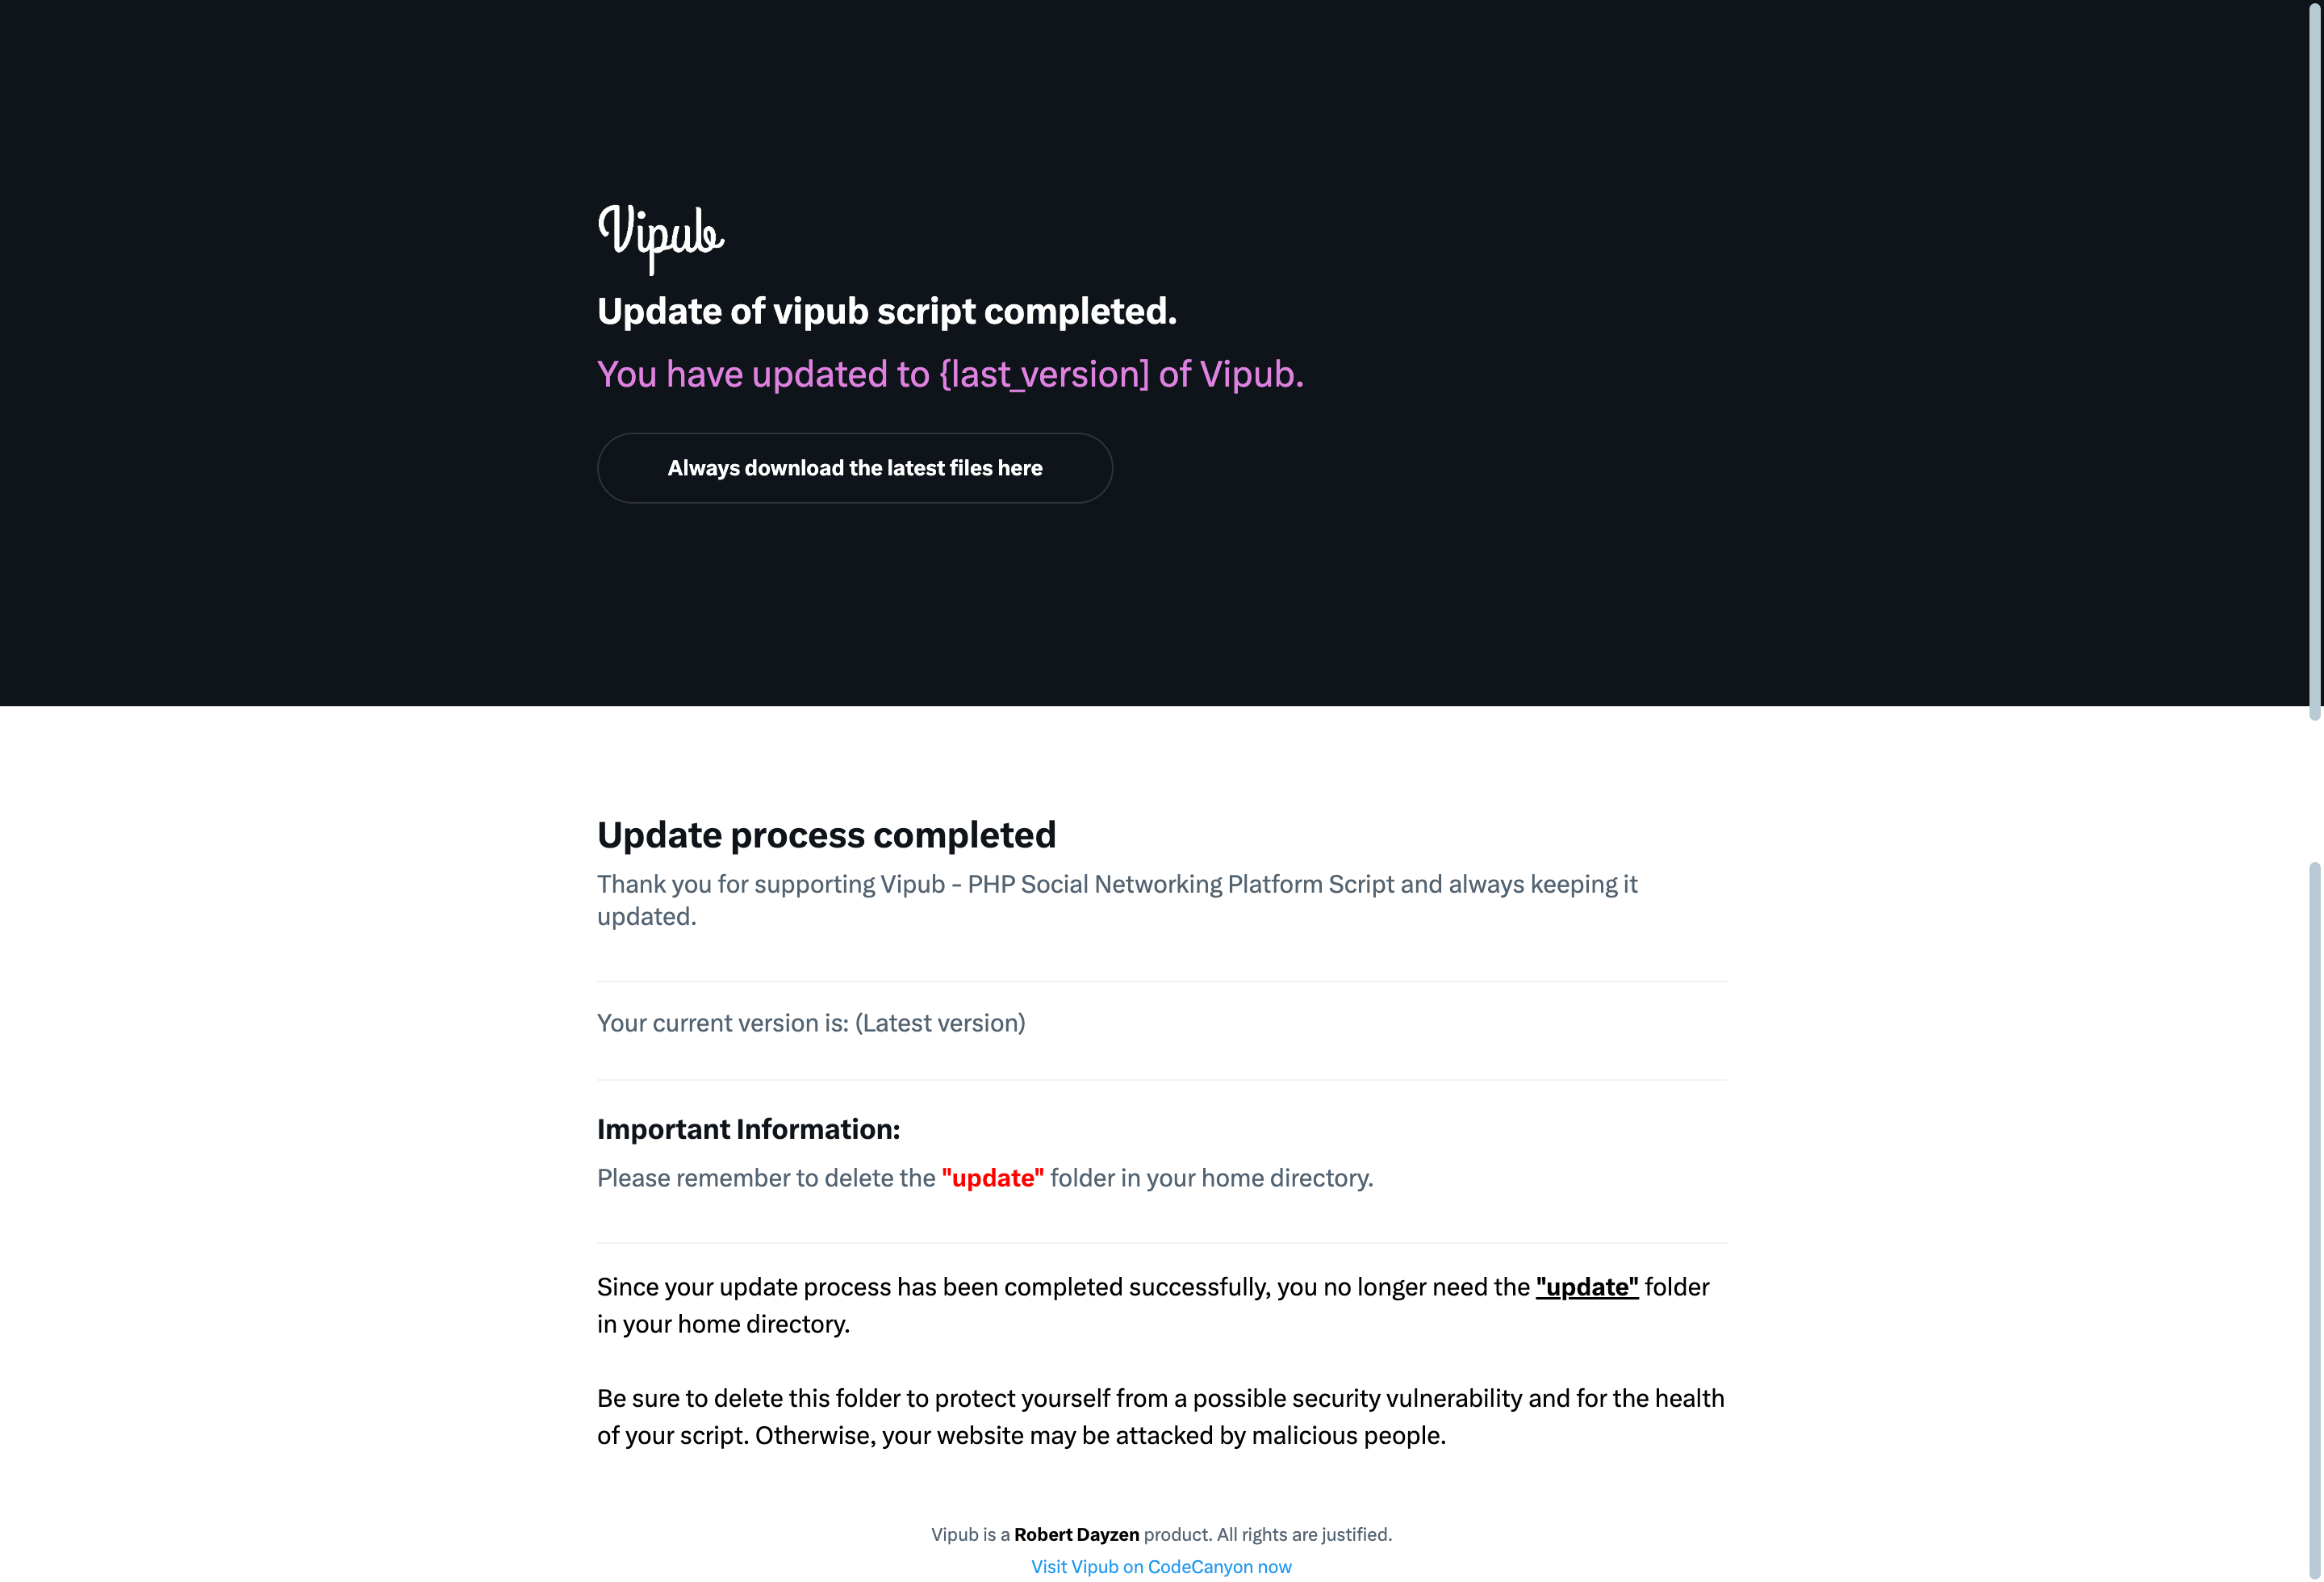
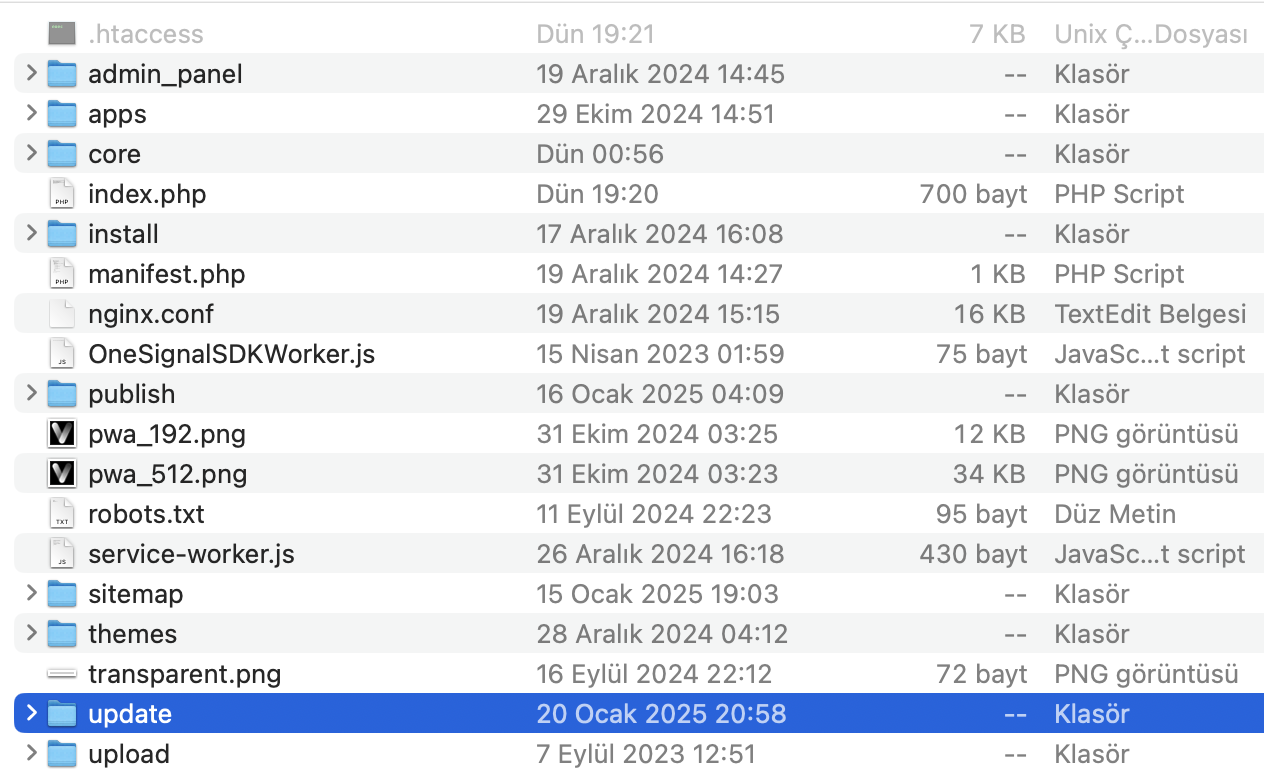
Now let's move on to the next step. Copy everything in the update file you downloaded from CodeCanyon, except the "update" folder, to the main directory of your server.
Once you have completed all these two steps, you have now updated your Vipub script and can start using it!
Now your script is finished updating. Now go to
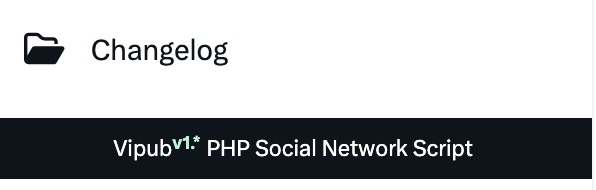
your-website.com/admin_cp to check the accuracy of your version. And scroll to the bottom of the left sidebar.
After scrolling to the bottom you will be able to see your current version here:
Vipub {version_number} PHP Social Network Script
Common Issues
We listed some common issue you should be aware of and know how to fix them.
This may cause due folder permission error, or apache issue, please contact your host provider and let them fix it for you. Please note this is not a script problem.
Contact your server provider, and ask them to increase post_max_size, max_execution_time and upload_max_filesize in PHP.ini file. Please note this is not a script problem.
Please make sure that the .htaccess file is uploaded to your server and updated to latest version.
If the file is exists, but you still face this issue, please contact your host provide, and let them enable mod_rewrite.
If you are using a VPS with Ubuntu Linux installed, please follow this guide.
Please test your SMTP credentials at SMTPER, if the same config worked by the test, please contact us.
FAQs
A FAQ is a list of frequently asked questions (FAQs).
We don’t use any third party PHP frameworks, the script is built on Pure PHP code, we use our own framework basically.
The code is open source, you can edit, add, remove any code you would like.
You can use any hosting service provider to run Vipub.
With one purchase code you can use it on one domain name. You need to get Added license for every Added domain name, please check Envato Help Page for more information about licenses.
If you need support, or if you're facing any problems, please contact us via Envato Support
Please note that our respond can take up to 2 business days.
Please note that our respond can take up to 2 business days.
- Availability to answer questions, Answering technical questions about item’s features, Assistance with reported bugs and issues, Help with included 3rd party assets.
- Any customization request will be ignored.
- Please make sure to read more about the support policy.
Support
If this documentation doesn't answer your questions, So, Please send us Email via Item Support Page
We are located in GMT +5:30 time zone and we answer all questions within 24 hours in weekdays. In some rare cases the waiting time can be to 48 hours. (except holiday seasons which might take longer).
NOTE: While we aim to provide the best support possible, please keep in mind that it only extends to verified buyers and only to issues related to our template like bugs and errors. Custom modifications or third party module implementations are not included.
Don’t forget to Rate Vipub!
Please Add your Review (Opinion) for Our template. It would be a great support for us. Go to your CodeCanyon Profile > Downloads Tab > & then You can Rate & Review for our script.
Changelog
See what's new added, changed, fixed, improved or updated in the latest versions.
v2.2.5
(Fixed) - Critical bugs in the previous version have been fixed
v2.2.4
(Updated) - System Security
(Updated) - System Optimization
(Updated) - Vipub PHP Dependencies
(Updated) - Vipub JS Dependencies
(New) - Added German, French, Spanish and Portuguese languages
(New) - Added feature to pin post to profile
(New) - The page layout is supported for right-to-left (RTL) languages.
(New) - Added feature for users to delete their own accounts.
(New) - Added ability to redirect to post content when clicking on post
(New) - Added LiteSpeed compatibility capability
(New) - A system has been integrated to seamlessly transfer all your Sngine users to Vipub
(New) - A system has been integrated to seamlessly transfer all your WoWonder users to Vipub
(New) - A real-time conversion structure was implemented using Exchangerate API for the Flutterwave payment system.
(New) - Flutterwave payment gateway added
(New) - Iyzico payment gateway added
(New) - Added follower adding system to the user
(New) - Added modal system to respond quickly to posts
(New) - Added privacy setting system for users' direct messages
(New) - Added ability to share images via Copy/Paste
(New) - Added Censored Words system for unwanted words in posts
(New) - Added Censored Domain system for unwanted domain in posts
(New) - Added Brute Force Detection system for user account security
(New) - Added ability to embed mobile apps on landing pages
(New) - Added permission system for users to switch between "Themes". Open/Close
(New) - Added ability to set default site appearance White/Black
(New) - Added /update.php page to update the script more easily
(New) - Added ability to reply to posts without page refresh and list replies without page refresh
(New) - +20 new data added to website currency symbol
(New) - +20 new data added to website currency
(New) - Added ability to show loading gif when changing profile photo
(New) - Added ability to save to cloud storage for profile photo
(New) - Added FTP Storage capability for media files
(New) - Added Backblaze cloud storage capability for media files
(New) - Added Wasabi cloud storage capability for media files
(New) - Added 20+ new Country VAT Rate support
(New) - Added ability to edit current Country & VAT
(New) - Added Ability to add new Country & VAT value
(New) - Added the ability to send bulk notifications from the Admin Panel to all users subscribed to notifications
(New) - Added OneSignal Push Notifications capability
(New) - Dynamically added scroll event in the right sidebar when the page scrolls
(New) - Added "My Ads" page to see all the ads you've created
(New) - Added ability to create paragraph answers to the answer system
(New) - Vipub sharing plugin added. (Provide direct share link to your own website)
(New) - Added Stories tab to preferred Feed area
(New) - Added login system with your Sngine account
(New) - Added support for all world languages to admin panel / Languages
(New) - Added system for adding likes to a post from the admin panel
(New) - Improved OEmbed system added
(Redesign) - Custom email sending template has been renewed
(Redesign) - Welcome page colors changed to lighter colors
(Update) - Nginx compatibility capability upgraded
(Update) - Improved dynamic sitemap creation structure
(Update) - The Reserve / Banned usernames structure has been completely changed and started to support the comma separated system
(Fixed) - Fixed the issue where already verified accounts would lose their verified badges when they upgraded to Premium
(Fixed) - Fixed bug with withdrawing funds using wallet balance
(Fixed) - Fixed the issue where earnings were not added for the user registered through the affiliate program
(Fixed) - XSS vulnerabilities in areas such as posting, replying to posts and quoting have been fixed
(Fixed) - 2FA login issue bug fixed
(Fixed) - Fixed the issue of showing double headers on the Direct Messages page with the user.
(Fixed) - Fixed mobile menu and mobile bottom status bar color transparency issue in responsive design
(Fixed) - Password reset request email design issue fixed and replaced with new design
(Fixed) - Fixed the error where the new password could not be determined with the password reset link.
(Fixed) - Fixed the issue of not receiving a password reset link via email.
(Fixed) - Fixed the issue where Latin letters were not allowed in the screen name update section
(Fixed) - XSS vulnerability for "Full name" in the registration system has been fixed
(Fixed / Update) - Fixed double click issue when changing profile picture and increased minimum profile picture size to 10MB
v2.2.3
(New) - A new page has been added for clarity after successful installation.
(Update) - Admin panel links updated to "admin_cp".
(Update) - Nginx support upgraded (v1.2)
(Update) - Files with phtml extension have been dynamicized as PHP
(Fixed) - Composer version problem fixed
(Fixed) - Fixed reported bugs in the Automatic Installation system
(Fixed) - Fixed reported "Brazil" timezone error
(Fixed) - Fixed reported Stripe API push bug
v2.2.2
(New) - Nginx support added (Beta)
(New) - Added "Show more / Show less" system for texts longer than 500 characters
(New) - Added new variants for user notifications.
(New) - System to display a user's past username changes. "Old/New" (Admin panel)
(New) - System to display a user's past email changes. "Old/New" (Admin panel)
(New) - Added the ability to display the website logo as "Favicon or default logo" (on/off).
(New) - Added a system to send "Your account is under review" and "Your account has been approved" notifications when users submit an account verification process.
(New) - Added "Profile sharing tool" system to the user profile. (Web Sharing API)
(New) - The site's meta:title, meta:description and meta:image elements have been restructured and made dynamic for SEO.
(New) - In user wallet balance transactions, a system has been added to convert all transactions to the user's country currency (exchange rate).
(New) - Google Fonts support and the ability to specify a new site font from the website settings (Admin panel) have been added.
(New) - Commission (VAT) system has been added. (Value can be set from admin panel.)
(New) - The 4 most followed user accounts feature has been added to the admin panel homepage.
(New) - An information system showing the average monthly visitor count of the site has been added to the admin panel homepage.
(New) - The ability to add and delete new languages has been added via Admin panel > UI Languages.
(New) - A system has been added that allows users with multiple accounts to delete their accounts one by one or all by selecting them.
(New) - A system has been added for users to create ads.
(New) - The ability for the site administrator to receive (Commission / VAT) from ad campaigns and wallet top-ups has been added.
(New) - The ability to create tweet ads (Visible in User Feed)
(New) - Banner ad creation system. (Appears on Search and Discover pages)
(New) - Create a customized #Hashtag ad. (Shown in right sidebar)
(New) - Added the ability to show/hide the post sharing box on mobile devices (Admin panel)
(New) - Added 2 new pages Replies and Subscribers to the profile page.
(New) - Added a user subscription system
(New) - Added a user Premium system
(New) - Added a tweet reporting system.
(New) - 30+ new Restful APIs for native mobile apps in Vipub's system codes.
(New) - Added Russian display language
(New) - Paragraphing system has been added to direct messages.
(New) - Added compression system for system backend for Video and Image file uploads
(New) - Added an external page to manage user reports (Admin panel)
(New) - Improved user interaction with script components for composer with updated UI
(Renewed) - Serious innovations have been made in responsive design
(Renewed) - Mobile menu has been renewed
(Renewed) - Some improvements have been made to the regional hashtag listing structure.
(Renewed) - New user messaging page
(Renewed) - New user settings page
(Renewed) - The icon designs used in the interface have been changed
(Renewed) - The user reporting system has been renewed and a structure to specify the reason has been added. (more than 20 options)
(Fixed) - Important and critical errors when clicking the return button have been corrected. A new code structure was written for the return structure.
(Fixed) - Fixed the issue where posts sent in Arabic were not appearing as RTL.
(Fixed) - Critical errors regarding the total number of followers and followers list on the profile have been corrected.
(Fixed) - Critical errors regarding the total number of following and following list on the profile have been corrected.
(Fixed) - Fixed critical bug regarding total number of posts on profile.
(Fixed) - Fixed the bug where "mention reply and post reply" in the notification system was not opened.
(Fixed) - Fixed the issue where shared stories could not be viewed.
(Fixed) - Fixed reported bugs of the prev version
(Fixed) - a bug with login through social networks
(Core) - System kernel optimized for APIs
(Core) - Removed unused libraries
(Core) - Composer compatibility updated
And the handling of more than 400 system files covering the entire script has been overhauled.v2.1.6
(New) - Added ability to dynamically change the site's UI theme via the admin panel
(New) - Added ability to select 10+ website currencies and website currency symbols from admin panel.
(New) - Added ability to set affiliate program user earnings from admin panel.
(New) - Dynamic language control and new language adding structure has been added for language management (Admin panel)
(New) - Added dark theme option
(New) - Added darkness theme option
(New) - Stripe payment gateway added
(New) - RazorPay payment gateway added
(New) - PayStack payment gateway added
(New) - Added the ability to change the currency set for the "Payment provider" to the site currency using the exchange rate when adding funds to the user wallet. (Successfully uploaded funds are automatically converted into the site currency and reflected.) NOTE: Not valid for Paystack
(New) - Balance transfer system from user wallet to other users
(New) - Instruction system for withdrawing balance from user wallet to bank account
(New / Fixed) - Fixed and improved user wallet and wallet management system
(New) - Affiliate Program system for users to earn money
(New) - Added feature to collect donations from users
(New) - Added feature to specify users' gender on registration page
(New) - Added profile photo and cover photo specific to user gender
(New) - Added two-step verification system with Google Authenticator
(New) - User ads creation/publishing system
(New) - Added ability to share up to 4 photos
(New) - New post sharing system added. Posts containing "#, @ and domain" addresses are marked in blue, just like on Twitter.
(New) - If the allowed characters in the post sharing box are exceeded, the background color of the exceeded characters is marked red (works like on Twitter)
(New) - Added a new structure for the character limit shown in the new post share. Color transitions between "Blue, Yellow, Red" will work more dynamically.
(New) - Added "Search GIF" feature to GIF selection area
(New) - If a video is embedded in the post, an information card is added that shows the "Processing" time for the video to load and states "Do not close the browser tab."
(New) - Added autocomplete for "#{hashtag}" phrases when creating a post
(New) - Added autocomplete for "@{user}" phrases when creating a post
(New) - Added ability to add cover photo to user profile
(New) - Posts reporting system
(New) - Added dynamic PWA system
(New) - User can create new polls and vote on polls
(New) - Ability to view total number of votes cast for the relevant poll
(New) - Ability to specify expiration time "Day, hour and minute" details for the created survey
(New) - User session times will be stored for 1 year by default and the user account will not be automatically logged out.
(New) - Added ability for users to create applications for the Vipub OAuth client.
(New) - A new "API Application" system has been added for users to access "Vipub APIs".
(New) - Added ability to set affiliate program user earnings from admin panel.
(New) - Added infinite scroll for user homepage timeline.
(New) - Added infinite scrolling capability with Ajax to Explore and Search pages. "Content is loaded as the page is scrolled."
(New) - Added feature to show how many people viewed posts
(New) - The total posts of the users have been updated with expressions like "K, M, B" for the number of followers and followers they follow or the number of views of other posts, and "2.0 K, 3.1 M, 1.0 B" to make the numbers look more minimal.
(New) - Added feature to see message read information in messages
(New) - Added ability to turn on/off message read notification from admin panel
(New) - Added "Switch Account" ability to quickly switch between your accounts
(New) - Added the ability to turn on/off message read information to the Admin Panel
(New) - Added information card that informs users "Good morning, Good afternoon, Good evening".
(New) - Added ability to turn on/off Good morning, Good afternoon, Good evening feature in admin panel
(New) - HTML5 games are supported so that users can experience the game directly without leaving the website.
(New) - You can add new games, edit and delete them via the admin panel.
(New) - Added the ability for users to experience listed movies directly without leaving the website.
(New) - You can add new movies, edit and delete them via the admin panel.
(New) - Tags listed in Trending Topics will no longer only accept phrases that start with "#" and will now list the most commonly matched phrases in user-generated content
(New) - Users can create and share new stories. (Stories)
(New) - Users have the ability to see how many people viewed their stories
(New) - Users can see how many people liked their stories and receive notifications from users who liked them.
(New) - Users can now record and share audio during messaging
(New) - Ability to turn on/off user messaging via admin panel
(New) - Added a system to verify user email addresses with a 6-digit code
(New) - Added ability to turn on/off the user email address verification requirement setting in the admin panel
(New) - Added the ability to share up to 4 photos when commenting on a post
(New) - Added the ability to share videos when commenting on a post
(New) - Added the ability to share GIF when commenting on a post
(New) - Added the ability to set your comment to /Anyone can reply & no one can reply when commenting on a post
(New) - The phrases "http/https or www" at the beginning of the links placed in a post have been removed and the overall length of the displayed URL has been limited to "29" characters. If it exceeds the limit, it will be cut with "...".
(New) - Added ability to show link previews (OG Meta)
(New) - Added the ability to turn on/off link preview and (OG Meta) data display settings from the admin panel.
(New) - Added infinite scrolling capability with Ajax to Explore and Search pages. "Content is loaded as the page is scrolled."
(New) - Added ability to add social media links to user profiles
(New) - Added ability to add followers to user (Admin Panel)
(New) - Added infinite scrolling ability via Ajax to user profile "Following" and "Followers" pages
(New) - Added ability for users to log in/sign up using their Github account (oAuth)
(New) - Added ability for users to log in/sign up using their Facebook account (oAuth)
(New) - Added Amazon AWS S3 integration for media file uploads.
(New) - Added ability to list, edit and delete Hashtags via Admin Panel
(New) - Country information used for hashtags and "interes score" feature for hashtags have been added.
(New) - Show what's happening within the "Location zone" for the user. (List hashtags for location information)
(New) - Admin can support new user registrations even if site registrations are closed by creating invitation codes
(New) - Added a feature where you can temporarily ban user accounts based on "date". (He cannot use some features on the platform until his ban ends.) -- (You cannot create a new post, send a new reply, or send a message.)
(New) - Added OAuth client for Vipub that can be integrated into other websites
(New) - Website logo added to Header (Sticky)
(New) - Bulk notification sending system to all users
(Renewed) - The comment display system within the post thread has been renewed.
(Update) - User profile redirects will now be redirected regardless of whether "@" is present or not.
(Update) - Profile design has been renewed in the user profile display system.
(Update) - Replaced the yellow gold verified user badge icon with a better visual
(Update) - Improved account privacy system
(Update) - GIF sharing system has been improved and its bugs have been fixed and made stable.
(Update) - Fixed the issue where the added GIF could not be deleted
(Update) - Fixed the issue where click events for image, video and gif selection were repeated twice in a row
(Update) - For "Alert" messages in the user "Login" system, "sweetalert2" was used instead of the old alert system.
(Fixed) - Fixed the Admin Panel favicon not changing issue.
(Fixed) - The problem of not being able to log in without refreshing the page in the "Login" system has been solved.
v1.9.5
- Fixed Contains urgent updates. (Applies to SQL, Vendor and Admin Panel)
v1.9.4
- Fixed Urgent update for critical bugs reported in previous version.
v1.9.3
- Added YouTube, Vimeo and Instagram links are placed within the iframe. (This function has been revamped and created entirely from scratch.)
- Added Language file editing can now be done from the admin panel.
- Added Added User Multiple Account Holder (Control System) /User Edit Page.
- Added User profiles can now be accessed without the "@" sign. (/robertdayzen)
- Added "Quote Tweet" system added.
- Added Associated Accounts system added.
- Added Sign in with your Google account.
- Added Set your timeline content viewing status.
- Added User reporting system added.
- Added Added ban on users not being able to create hashtags.
- Added Added user profile privacy system.
- Added Added "Blue, Gold and Grey" color options for verified badges and a "Square profile photo" feature for profiles with a "Gold - Grey" checkmark.
- Added Added "select category" feature for verified accounts.
- Added Clicking on the username in a verified account profile opens a mockup for its verified status (Details shown).
- Added Verified account applications (Open/Close) system has been added from the admin panel.
- Added Banned usernames feature added. (Usernames you do not want to be taken.)
- Added Added system to create fake users.
- Added Dynamic sitemap creation system added (Posts, Users, Pages).
- Added Added system to check user profile API calls used.
- Added "Posts, People and Media" pages have been added to the "Explore" page. (Usage is the same as Twitter.)
- Added Added user account deletion (disable) feature.
- Fixed Technical errors in the password reset link have been fixed and made operational.
- Fixed Errors in e-mail notification preferences have been fixed and made functional.
- Fixed The status bar on the profile page, which was created to notify you if a user was following you, was not working, this error has been fixed.
- Update Switched to (password_hash) system to store user passwords.
- Update Improvements have been made to the system of translating post texts into your browser language with Google, and calls have been updated.
- Update Email sending system via SMTP has been updated for its Added version.
- Update Admin panel design and functions have been completely reAddeded.
- Update Twitter view reworked and implemented instead of unwanted Instagram view.
- Update Welcome landing page redesigned.
- Update Updated for PHP version 8.2.0.
v1.0.2
- Added [Added] - The design structure of Instagram and Twitter (Theme)
- Added Welcome page with a simpler look
- Added Added post sharing design
- Added Added post listing design
- Added Added post display system
- Added Added post privacy system (Toggle commenting)
- Added System for embedding TikTok videos
- Added System for embedding YouTube videos
- Added System for embedding Instagram posts
- Added System for embedding Twitter posts
- Added User bookmarks system
- Added Customized emoji display system (Messages)
- Added Improved menu area for user profile. (Posts, Quotes, Media, Likes)
- Added 6 Added languages added. (Japanese, Chinese, Bengali, Hindi, French)
- Added Sign in system with Twitter
- Added Image sharing support for direct messages
- Added Emoji sharing support for direct messages
- Added System for selecting and sharing GIFs for Added post creation (import via GIPHY)
- Added Added an "Alert system" for banned users, informing them that they are banned. (Login page)
- Added Video sharing support for Added post (Existing bugs fixed, unusability problem fixed)
- Added Fixed the issue where non-logged-in users could use the like post and follow user buttons
- Added Fixed the issue where non-logged-in users could not view the "Explore page, user profiles and post detail
- Added Fixed the issue where the total notifications counter (not being reset)
v1.0.2
- Added The welcome page has been reworked to make it simpler and faster response time.
- Fixed Fixed a bug in code structure when clicking the dropdown menu in the non-login user timeline preview.
- Fixed Fixed the "video preview showing even if the video is not shared" on the tweet content page.
- Fixed Fixed some minor issues in the kernel and including styling.
v1.0.1
- Added Added ability to send SMTP Emails
- Added Added ability to toggle email sending
- Added User timeline refresh interval setting added
- Added Added user messaging page refresh time interval setting
- Added Number of unread messages" info counter added
- Added Added "Password reset sent" link info counter
- Added Ability to change your site logo and favicon was added
- Added Added forgot password page (Forgot password / reset password)
- Added Added emoji icon support to Added post creation window (icon)
- Added Added link support for #Hashtag and #Mention in profile bio area
- Added User video sharing support
- Added Added user email notifications
- Fixed Fixed the issue of not scrolling to the bottom message on the Messaging page
- Fixed Fixed the issue where the text on the messaging page is displayed side by side
- Fixed Fixed page corruption issue when trying to see "Media" items in user profile
v1.0 {}
Initial release.
License
Vipub is made by robertdayzen under Envato Extended & Regular License.
What is the different between Extended and Regular license?
- An Extended License is required if the end user must pay to use the end product, means that you should own an extended license if you will charge your end users.
- Both versions are similar, same features, updates and support services.
- Both can be used one domain only, means you need a license for every domain.
Social Login Setup
Vipub comes with a lot of social login plugins, your users can register to your website with one click!
Here is a setup guide on configuring social login.